Gauge on 6
Gauge on 6
In industrial process control, the term "gauge on 6" typically refers to the installation of level measurement instrumentation on a 6-inch (DN150) process connection or pipe chamber. While standard magnetic level gauges often utilize 2-inch (DN50) or 3-inch (DN80) connections, certain high-viscosity, high-pressure, or specialized interface applications necessitate a larger 6-inch footprint. Understanding the engineering requirements for a gauge on 6 is critical for ensuring structural integrity, measurement accuracy, and long-term reliability in demanding environments such as oil refineries, chemical processing plants, and large-scale water treatment facilities.
Measurement Principles of Magnetic & Local Level Gauges
Before selecting a specific configuration for a 6-inch installation, it is essential to understand the underlying physics of Magnetic & Local Level Gauges. These instruments operate based on the principles of buoyancy and magnetic coupling.
The Buoyancy Principle
The core component of the gauge is a float, which is engineered to have a lower density than the process liquid. According to Archimedes' principle, the float displaces a volume of fluid equal to its own weight, allowing it to ride on the surface of the liquid (or at the interface of two liquids). In a 6-inch chamber, engineers have the advantage of using larger, more buoyant floats, which can provide greater lifting force—a necessity when dealing with low-density fluids or high-pressure environments where the float must be reinforced.
Magnetic Coupling
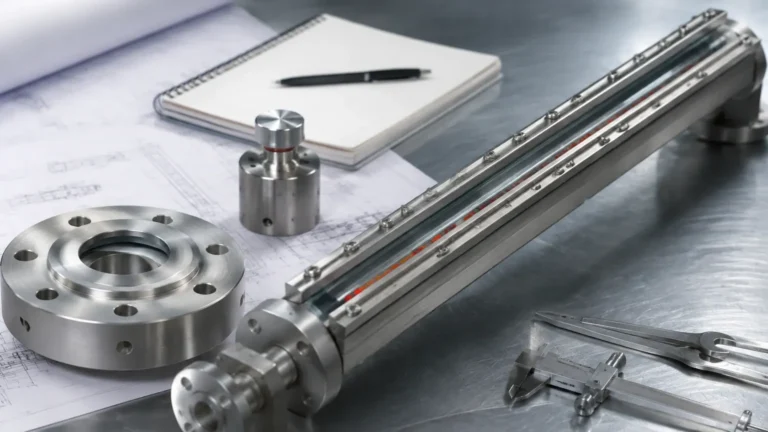
Inside the float is a high-intensity 360° magnetic ring. As the liquid level changes, the float moves up and down within the non-magnetic chamber (usually stainless steel). Outside the chamber, a local indicator—consisting of a series of bi-color magnetic flaps or a magnetic follower—is mounted. The magnetic field from the float penetrates the chamber wall and couples with the indicator. This causes the flaps to rotate (typically from white to red) or the follower to move, providing a clear, high-visibility local reading without the need for glass windows that are prone to clouding or breaking.
Why Specify a Gauge on 6?
While smaller diameters are more common, several technical factors drive the requirement for a 6-inch process connection or chamber:
1. High Viscosity and Slurries: In applications involving crude oil, bitumen, or fluids with suspended solids, smaller chambers are prone to clogging. A 6-inch chamber provides ample clearance around the float, reducing the risk of the float sticking due to buildup or viscous drag.
2. Low-Density Fluids: For fluids with very low specific gravity (SG), a larger float is required to generate sufficient buoyancy to move the magnetic indicators. A 6-inch chamber allows for a larger diameter float, which can achieve the necessary displacement.
3. Interface Measurement: When measuring the interface between two liquids (e.g., oil and water), the density difference may be slight. A larger float provides the sensitivity required to accurately track the interface layer.
4. Redundancy and Guided Wave Radar (GWR) Integration: A 6-inch chamber is often used as a "bridle" or bypass chamber that houses both a magnetic float and a guided wave radar probe. This dual-technology approach provides both a local mechanical reading and an electronic signal for the control room, fitting both instruments into a single 6-inch vessel.
Technical Selection Criteria
When designing a gauge on 6, engineers must evaluate the mechanical specifications of the chamber and the process connections. The following table outlines the primary differences between standard gauge sizes and 6-inch configurations.
| Feature | Standard (2" / DN50) | Large Bore (6" / DN150) |
| :— | :— | :— |
| Primary Application | Clean liquids, standard SG | Viscous fluids, low SG, dual-sensing |
| Float Diameter | ~45mm to 55mm | ~100mm to 140mm |
| Clogging Resistance | Moderate | High |
| Weight (per meter) | ~10 kg to 15 kg | ~35 kg to 60 kg |
| Max Pressure (Class 150) | 19 bar @ 38°C | 19 bar @ 38°C (Requires thicker walls) |
| Interface Sensitivity | Standard | High (due to larger float volume) |
Installation Considerations for 6-inch Gauges
Installing a gauge on 6 involves significant mechanical planning due to the increased weight and size of the instrument. Failure to follow proper installation guidelines can lead to chamber distortion, which may cause the float to bind.
Structural Support
A 6-inch magnetic level gauge is substantially heavier than standard models. For heights exceeding 3 meters (approx. 10 feet), the vessel nozzles alone may not be sufficient to support the weight. Support brackets should be installed to transfer the load to the tank wall or a secondary steel structure. These supports must allow for thermal expansion to prevent bowing of the chamber.
Alignment and Verticality
For the float to move freely, the chamber must be installed perfectly vertical. A deviation of more than 3mm per meter can increase friction between the float and the chamber wall, leading to erratic readings or "stiction." This is particularly important for 6-inch gauges where the float has a larger surface area.
Venting and Draining
Because 6-inch chambers hold a larger volume of process fluid, proper venting and draining are essential for maintenance. A 3/4" or 1" NPT drain valve at the bottom and a vent plug at the top are standard. In 6-inch configurations, flanged drains are often preferred to facilitate easier cleaning of the chamber interior.
Limitations of Large Bore Gauges
While the gauge on 6 offers solutions for difficult fluids, it is not without limitations:
* Cost: The material costs for a 6-inch stainless steel chamber and the corresponding large-diameter flanges are significantly higher than 2-inch models.
* Space Constraints: The physical footprint of a 6-inch gauge may interfere with other piping or vessel manways.
* Thermal Lag: In heated applications (e.g., steam-jacketed gauges), a 6-inch chamber has more thermal mass, meaning it takes longer to reach process temperature, which can affect the density of the fluid inside the chamber compared to the fluid in the main vessel.
Maintenance and Best Practices
To ensure the longevity of Magnetic & Local Level Gauges installed on 6-inch connections, a regular maintenance schedule should be implemented:
1. Flush the Chamber: Periodically use the drain valve to flush out any accumulated sediment or scale. This is especially important in 6-inch bypass applications where the larger volume may allow solids to settle.
2. Float Inspection: If the process fluid is corrosive, the float should be inspected annually for signs of pitting or weight gain (indicating a leak). In a 6-inch system, the float can be removed via the bottom flange.
3. Indicator Calibration: While the magnetic coupling is mechanical, the external indicator flags should be checked for free movement. Dust or salt spray in coastal environments can occasionally seize the flags.
Frequently Asked Questions (FAQs)
Q: Can a gauge on 6 be used for high-pressure steam applications?
A: Yes, but the wall thickness of the 6-inch pipe must be calculated according to ASME B31.3 or similar standards. Often, Schedule 80 or Schedule 160 pipe is required for high-pressure steam to ensure safety.
Q: What materials are available for 6-inch magnetic level gauges?
A: The most common material is 316/316L Stainless Steel. However, for highly corrosive media, 6-inch gauges can be manufactured from Hastelloy, Monel, or lined with PTFE. Note that the chamber must always be non-magnetic to allow the magnetic field to pass through to the indicator.
Q: How does the float design change for a 6-inch gauge?
A: In a 6-inch gauge, the float is typically wider and may be shorter or longer depending on the fluid density. Engineers use a larger magnet assembly inside these floats to ensure the magnetic field is strong enough to reach the indicator across the larger gap of a thick-walled 6-inch pipe.
Q: Is it possible to add transmitters to a 6-inch gauge?
A: Absolutely. One of the primary reasons for using a 6-inch chamber is to allow for the mounting of external reed-chain transmitters or magnetostrictive sensors alongside the local indicator, providing a 4-20mA or HART signal for the control system.
Summary of Engineering Confirmation
Before proceeding with the procurement of a gauge on 6, project teams should confirm the following data points:
* Specific Gravity (SG): Both the minimum and maximum operating SG to ensure float buoyancy.
* Operating Pressure and Temperature: To determine the required chamber wall thickness and flange rating.
* Fluid Viscosity: To confirm if the 6-inch clearance is sufficient to prevent float sticking.
* Center-to-Center Distance: The exact measurement between the process nozzles on the vessel.
By adhering to these engineering standards and understanding the unique requirements of large-bore instrumentation, facilities can implement reliable level measurement solutions that withstand the rigors of heavy industrial processing.