The Mounting Height from Floor Level for Switches Is
The Mounting Height from Floor Level for Switches Is
In industrial automation and process control, the precise installation of instrumentation is as critical as the technology itself. When engineers ask what the mounting height from floor level for switches is, they are typically addressing two distinct but related requirements: the process-driven setpoint (where the sensor detects the medium) and the ergonomic accessibility for maintenance and wiring.
For Level Switches, the mounting height is rarely a single fixed value like a domestic light switch. Instead, it is a calculated coordinate derived from the vessel's geometry, the liquid's behavior, and international safety standards for electrical accessibility. Understanding the interplay between these factors ensures that level detection is both accurate and maintainable over the long term.
Understanding Level Switch Measurement Principles
Before determining the specific mounting height, it is essential to understand how different technologies interact with the process medium. The physical principle of the switch dictates how and where it can be mounted on a tank or sump.
1. Buoyancy-Based Switches (Float Switches)
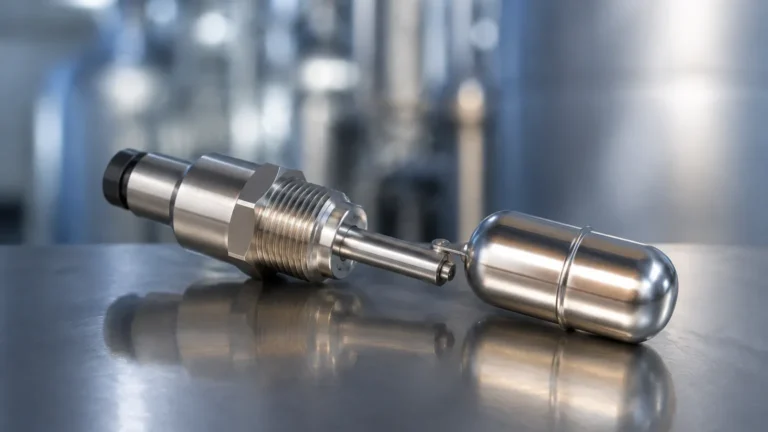
Float switches operate on the principle of buoyancy. A float containing a magnet moves with the liquid level, actuating a reed switch or a microswitch. These are commonly used for simple high or low-level alarms. Because they rely on physical movement, the mounting height must account for the "swing" or travel distance of the float to avoid interference with tank walls or internal baffles.
2. Vibrating Point Level Switches (Tuning Forks)
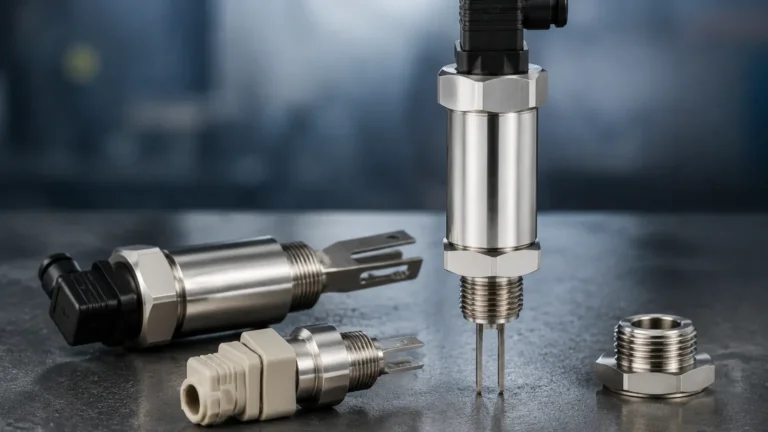
The sensor probe vibrates at its natural resonant frequency in the air. When the medium covers the probe, the frequency shifts or the vibration is dampened. This change is detected by the electronics and converted into a switching signal. These are highly versatile and can be mounted at almost any height, provided the probe is fully submerged at the desired alarm point.
3. Capacitance Level Switches
These switches measure the change in electrical capacitance between the sensor electrode and the tank wall (or a reference electrode). As the liquid level rises and displaces the air, the dielectric constant changes. These are ideal for powders and liquids but require calibration based on the specific mounting position and the material's properties.
4. Ultrasonic and Optical Switches
These are often non-contact or gap-sensing technologies. Ultrasonic switches emit high-frequency sound waves, while optical switches use infrared light refraction. The mounting height for these must ensure a clear "line of sight" to the detection point, free from foam or heavy steam that might cause false triggers.
Determining the Mounting Height: Process vs. Ergonomics
When determining the mounting height from floor level for switches is a priority, the engineering team must balance the following two criteria:
Process Setpoints (The Internal Height)
The primary function of a level switch is to prevent dry running (low level) or overfill (high level).
- High-High (HH) Alarm: Usually mounted at the highest safe point, often 50mm to 150mm below the top of the vessel.
- Low-Low (LL) Alarm: Mounted near the bottom to protect pumps, ensuring the suction line remains submerged.
Maintenance Accessibility (The External Height)
From an electrical and maintenance perspective, the "mounting height from floor level" refers to the position of the junction box or the local operator interface. According to common industrial standards (such as those influenced by ISO or NEC guidelines):
- Standard Accessibility: For switches requiring manual reset or local visual inspection, the ideal mounting height is between 1.2 meters and 1.5 meters (approximately 4 to 5 feet) from the floor or permanent platform.
- Maximum Height: If a switch must be mounted higher than 2.0 meters, a permanent ladder or platform is generally required to ensure technician safety during calibration or repair.
Technical Selection Table for Level Switches
Selecting the right switch depends on the fluid characteristics and the physical constraints of the mounting location.
| Switch Type | Recommended Media | Mounting Orientation | Typical Accuracy | Maintenance Access Needs |
| :— | :— | :— | :— | :— |
| Float Switch | Clean liquids, water | Top or Side | ±5mm | Low (Mechanical) |
| Tuning Fork | Liquids, slurries, powders | Side or Top | ±1mm | Moderate (Electronic) |
| Capacitance | Acids, granules, oils | Side-mount | ±2mm | High (Calibration) |
| Ultrasonic | Corrosive chemicals | Top-mount | ±3mm | Low (Non-contact) |
| Hydrostatic | Deep wells, large tanks | Submerged | ±0.5% FS | Moderate (Venting) |
Installation Considerations and Best Practices
Correct installation involves more than just picking a height; it requires attention to the physical dynamics of the vessel.
1. Avoiding Turbulence and Inflow
Never mount a level switch directly in the path of an inflow pipe. The kinetic energy of the entering liquid can cause mechanical damage to float switches or create false "covered" signals for vibrating forks. If the mounting height must be near an inlet, use a stilling well or a baffle plate to protect the sensor.
2. Nozzle Length and Dead Zones
For side-mounted switches, the length of the mounting nozzle (the pipe stub protruding from the tank) is critical. If the nozzle is too long, the medium may become trapped or "bridge" inside the pipe, preventing the switch from resetting when the level drops. Ensure the sensing element extends at least 20mm beyond the internal wall of the tank.
3. Wiring and Conduit Entry
When the mounting height from floor level for switches is established, ensure the electrical conduit enters from below or includes a "drip loop." This prevents moisture and condensation from running down the cable and entering the electronics housing, which is a leading cause of premature switch failure in outdoor or wash-down environments.
Limitations and Environmental Factors
While Level Switches are robust, certain conditions can limit their effectiveness regardless of the mounting height:
* Coating and Buildup: In applications involving wastewater or chemical resins, material can build up on the probe. While tuning forks have some "self-cleaning" vibration, heavy coating will eventually cause a fault.
* Pressure and Temperature: Ensure the switch's process connection and seal materials are rated for the vessel's maximum operating pressure. Standard switches are often rated for 10-40 bar, but high-pressure variants are required for boiler applications.
* Vibration: In tanks with heavy agitation, the mounting height should be chosen to minimize the mechanical stress on the sensor stem. In extreme cases, remote-mounted electronics are preferred.
Frequently Asked Questions (FAQ)
Q: What is the standard mounting height for a sump pump level switch?
A: For sumps, the mounting height is usually determined by the "Turn-On" and "Turn-Off" levels. The turn-off point should be at least 100mm above the pump intake to prevent cavitation, while the turn-on point is typically 300mm to 500mm higher, depending on the sump's volume.
Q: Can I mount a level switch horizontally?
A: Yes, many vibrating forks and float switches are designed specifically for horizontal side-mounting. However, you must ensure the cable entry points downwards to prevent water ingress.
Q: Does the mounting height change for hazardous areas?
A: The physical height remains the same, but the installation must comply with ATEX or IECEx standards. This includes using intrinsically safe barriers or explosion-proof housings, which may increase the physical footprint of the switch at the mounting point.
Q: How do I handle mounting in tanks with internal agitators?
A: The switch should be mounted in a position where the blades of the agitator cannot strike the probe. This often requires a top-down mounting height with a protective sleeve or a side-mount positioned in a "dead zone" of the agitation vortex.
Conclusion
Determining the mounting height from floor level for switches is a task that combines process safety with operational common sense. By prioritizing the alarm setpoints required for vessel safety and ensuring the electronics remain accessible for routine testing, facilities can significantly reduce downtime. Whether utilizing float, capacitance, or vibrating technologies, the goal remains the same: reliable detection that is easy to manage. For complex applications, consulting with a professional manufacturer ensures that the chosen Level Switches are matched perfectly to both the medium and the physical constraints of the site.
Download The Mounting Height from Floor Level for Switches Is as a PDF